With Artsy Editor, editing posts and images is easier than ever. It gives you a clean writing experience that you can customize as you want, and lets you drag-and-drop pictures to upload them. The good thing is, it’s not difficult to get started with, either. Here’s what you’ll need to do to install Artsy Editor, tweak it to work the way you want, and stay up to date with the latest version.
Installing Artsy Editor
Installing Artsy Editor only takes a few moments. Once you’ve purchased a copy of Artsy Editor, just download the plugin and save it to your computer. Log into your site’s WordPress dashboard, and open the Install New Plugins page. Select the Artsy Editor plugin file you downloaded, then install and activate it as normal.

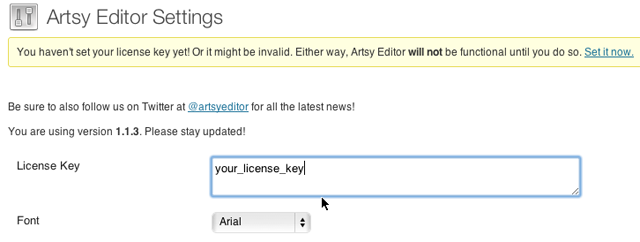
Once it’s installed, you’ll need to add your license key before you can start using Artsy Editor. You can find your license key in your Artsy Editor account you made when you purchased the plugin. Copy it, then head over to the Artsy Editor page, which is located under your WordPress Plugins settings on the left menu, and paste it in the License Key box. Click Save at the bottom of the page, and you’ll be ready to start using Artsy to make your WordPress writing and editing experience more enjoyable.
Using Artsy Editor
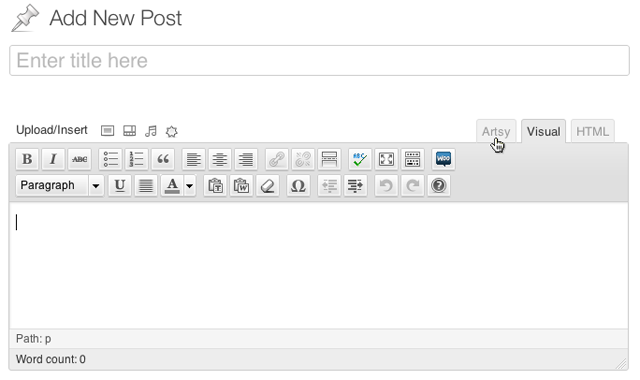
You’re now ready to start putting Artsy Editor to use. Artsy Editor adds a third tab to the top of your post and page editor box, so you can easily edit old posts or write new ones. Just select the Artsy tab, and the full-screen Artsy Editor open over your WordPress dashboard to give you a clean view of your article.
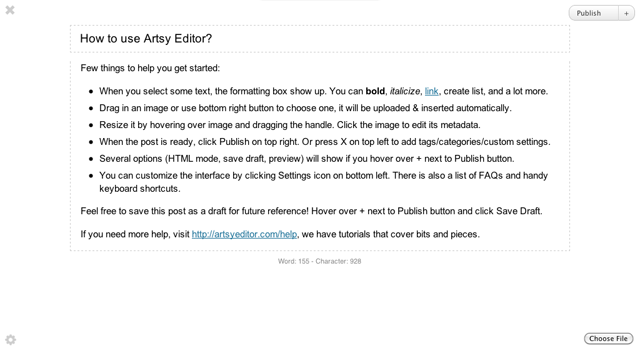
Artsy Editor has four buttons by default: a settings button in the bottom left, close button in the top left, publish button in the top right, and an Upload button in the bottom right. You’ll also see your current word and character count right below your post. Start writing, and everything except your text and word count will fade away. They’ll come back as soon as you move your mouse, ready for action when you are.
The first time you open Artsy Editor, you’ll see a default post with info about the plugin. Feel free to save it as a draft post for future reference, or delete it and get started writing your own post.
Tweak Artsy Editor to Fit Your Style
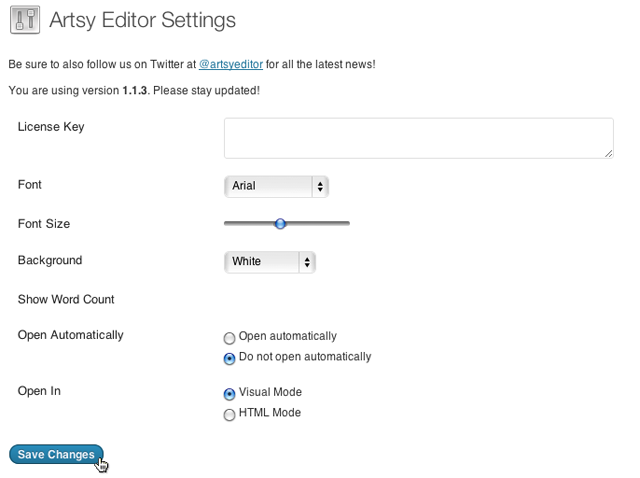
Artsy Editor works quite nice from the first time you install it, but it also has a number of settings you can tweak. Click the gear button in the lower left corner to open the Settings pane. Here, you can change the font, font size, and background color, turn on or off the word and character count, and choose whether to open Artsy Editor by default when you edit a post in WordPress. Additionally, you can choose to edit in the default Rich text mode or in HTML editing mode.
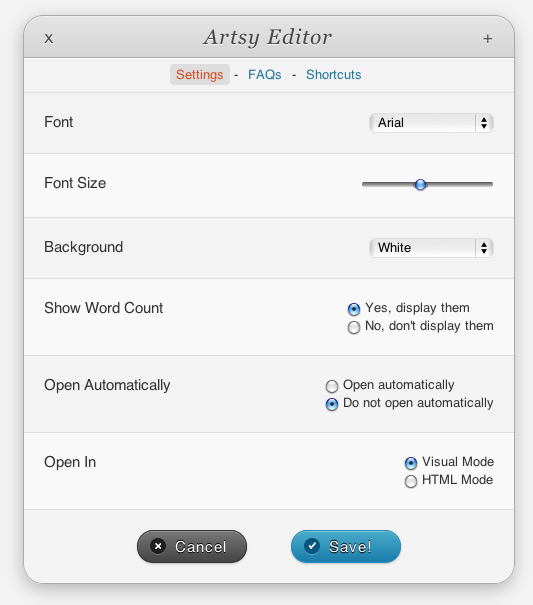
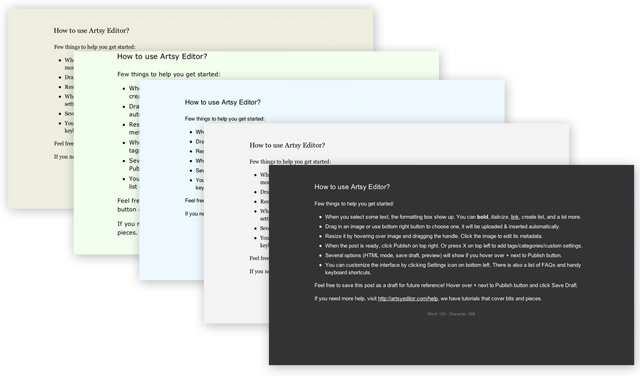
The color and font settings are a great way to get your WordPress editing environment working the way you want. You can tweak them to get anything from a classic literary look to a cheerful pastel to a focused terminal style. Whatever your mood and preference, Artsy Editor is ready to work the way you want to.
Alternately, if you’re not currently writing a post, you can change the font and style from the normal Artsy Editor settings menu, where you added your license key originally. All of the options are available on both settings screens. And if you want to really tweak Artsy Editor, you could head into the plugin editor and change the original code. Have fun!
Staying Up to Date
We’ve worked hard to make Artsy Editor work great as soon as you install it, but with new features being added to WordPress all the time, we’ve got to keep working to make sure it always offers a great editing experience. You’ll get free updates to Artsy Editor until our next major release once you’ve purchased it. To see if there are new updates available, just head to your Artsy Editor settings page. You’ll see a list of all of the changes on the right, and can update to the latest version in 1 click.

With a simple install process, settings to make your editor match your favorite style, and free updates with the latest features, Artsy Editor is a great compliment to your writing experience. We’d love to hear how you’re using it. Feel free to send us a message and let us know what you like best, or would love to see changed!


